NEOCLASSICISM PAINTINGS

EMPIRE CUT DRESSES

Jacques-Louis_David_016


Jacques-Louis David. Madame Recamier. Oil on canvas. Private collection
portrait_of_henriette_de_verninac-large
Jacques-Louis David. Portrait of Henriette de Verniac. Oil on canvas. 1799. 145 x 112 cm. Musee du Louvre (Paris, France)

HISTORICAL PAINTINGS

consecration_of_the_emperor_napoleon_i_and_coronation_of_the_empress_josephine-large

sdfg sdfghgfd

The public admiring «The coronation of Napoleon» by Jacques-Louis David at the Louvre, 1810.

sdfgbf

Portrait of Carolina Bonaparte, sister of Napoleon unknown author.

ODALISQUES

Imagen

Imagen

Jean-Auguste Dominique Ingres. La Grande Odalisque. 1814. Oil on canvas. 91 x 162cm. Louvre, France.

Imagen

Jean-Auguste Dominique Ingres. Baigneuse u Odalisque. Detail inspired by the Bain turc. 1864. Watercolor on tracing paper. 34 x 23 cm. Bonnat Museum, Bayonne.

ROCOCO PAINTINGS

LUDIC ACTIVITY

Jean-Honoré Fragonard. Young Woman Playing with a Dog. 1765-72. Oil on canvas. 70 x 87 cm. Fondation Cailleux, Paris.

Françoise Boucher. Girl Reclining (Louise O’Murphy). 1751. Oil on canvas. 59,5 x 73,5 cm. Wallraf-Richartz-Museum, Cologne.

COURTESY LOVE

Jean-Honoré Fragonard. The Swing. 1767. Oil on canvas. 81 x 64 cm. Wallace Collection, London.

WOMEN READING

Jean-Honoré Fragonard. A Young Girl Reading. 1770. Oil on canvas. 81 x 65 cm. National Gallery of Art, Washington.

PRIVACY OF COUPLE

Jean-Honore Fragonard. The Bolt. 1777. Oil on canvas. 73 x 93 cm.Musée du Louvre, Paris.

COMMON AREAS IN THE TWO PERIODS

PORTRAIT AND SELF-PORTRAIT

Self-portrait holding a portrait of her sister. 1715. Pastel on paper. Uffizi Gallery

Jean-Baptiste Greuze. Portrait Of A Young Woman, Said To Be The Artist’s Daughter. Oil on canvas. 63.5 x 53.3 cm. Private collection

Antoine-Jean Gros. Portrait of Mademoiselle Recamier. Oil on canvas. Public collection

                         Madame Raymond de Verninac. 1798-99. Oil on canvas.145 x 112 cm. Musée du Louvre, Paris.         

MYTHOLOGY

François Boucher. Leda and the Swan. 1741.

Rosalba Carriera. Nymph from Apollo’s Retinue. 1721. Oil on canvas. Public collection.

Pierre-Narcisse Guérin. Morpheus and Iris. 1811. Oil on canvas. 251 x 178 cm. The Hermitage, St. Petersburg.

Anne-Louis Girodet de Roucy-Trioson. Mademoiselle Lange as Venus. 1798. Oil on canvas. 170 x 87,5 cm. Museum der bildenden Künste, Leipzig.

DAILY LIFE

Jean-Baptiste-Simeon Chardin. The Prayer before Meal. 1744.Oil on canvas. 50 x 38.5 cm. Hermitage (St Petesburg, Russian Federation)

Jean-Baptiste-Siméon Chardin. The Laundress. 1730. Oil on canvas, 38 x 43 cm. The Hermitage, St. Petersburg.

Jean Auguste Dominique Ingres. Madame Jean Auguste Dominique Ingres, born Madeleine Chapelle. Drawing. Private collection

Jean Baptiste Greuze. The Complain of the Watch. 1770.

Oil on Canvas, 79,3 x61 cm. Alte Pinakothek, Munich.

OUR DRESS

Our practical research work ends here. It was an interesting task and we have learnt a lot.

We have been explaining all the process of our dressmaking during these months, and now we have finished the dress. You can see the photos here.

ImagenImagenImagen

Imagen

Thank you for visit our blog!

ImagenImagen

SHOES

Etiquetas

, , , , ,

Hi,

We were not clear about how to make the shoes because we did not find any that had a similar shape, so in the end we decided to do it with cardboard.

We took some molds that wore a shoes inside not to get break and we got it more pointed. After with several pieces of cardboard we finished the build and we stick it with silicone.

Finally we lined it with the same material that we used to the corset and we painted the heel with acrylic.

Shoes are not identical to the Rococo’s era but with this detail, our dress was more complete. You could see in these pictures how it’s made.

xOxO

ImageImageImageImageImage

DETAILS

Etiquetas

, , , , , , ,

Good day,

The Rococo costumes were very ornate and were full of details. We add various embellishments.

BOW

To begin, we made a bow on the back of the dress. We fold the fabric to form a rectangle and we cut it. Then we sewed over, leaving the seam in the middle so that it had more volume. We also sew the sides of these but we left a bit open to give him back. Once we have it to the right side, we sew the open and we put a piece of fabric ready before in the middle.

Finally we put the bow on the back of the dress with a safety pin.

SKIRT

On the undernearth of the skirt we cut a piece of lace fabric and we sewing it. Previously it had been prepared with pins to make it equal on all sides. We sew by hand because it saw the stitch and is best done.

In addition we made some flowers to sew on the dress with different fabrics: satin, tulle and brocade.

We did it searching for information on Internet. It consisted of cut fabric in pieces of 80 cm long and depending on the size that you wanted the flower more or less wide. After we had made ​​some stitching without knot in thread at the extreme of the strip and when it was made, you could pull and here appeared a gathered, to it did not undo we make a knot with the ends of the wires. It left a flower. As we cut the fabric it frayed, so we burn all the edges with a candle.

In the sleeves, we sewed a pearl in the center of the flower.

We also did other types. We did these drawing 6 small circles with the help of the little box, with chalk on the fabric and then cut it. With the help of a candle, we seal the edges of the circles because they do not parade. Then we fold the circle in half, and we passed the needle with a thread around the edge, stitch by passing over two-thirds  Then we bend and overlap another circle, leaving a third and go without sewing seam to join the two circles. We were doing this step consecutively up to join 6 circles. We wrinkled petals, carefully pulling the thread and thus forming the flower, and then we sew it because it opens gathered. Finally we added a plastic pebble in half because it is not a gap in the middle of the flower.

All these flowers were hand sewing to the skirt of the dress.

It was a meticulous work but the result was so perfect. We put some pictures here.

See you!

 ImagenImagenImagenImagenImagenImagenImagenImagenImagenImagen

SLEEVES (Part 2)

Etiquetas

, , , , , ,

Hello,

Finally we made the second part of sleeves. We took a lace cloth in ecru and we think how we would do to it was like they took. Then we decided to cut two pieces of fabric, one of 25 cm and one of 18 cm.

We put them together by a sice and we passed the needle with the thread so that it was curly and voluminous.

When we had prepared both sleeves, we gave it back to the sleeve green dress and we place it with pins.

Then we hand sewing taking advantage of the cloth that was inside the edge, but with a internal seam because this would not be see on the right side. We turned it and we ended up sewing in it two flowers made previously.

We’re nearly to finish the dress. Like always we put pictures which we have taken in the process.

Bye bye!

ImageImageImageImageImageImageImageImageImageImage

CORSET

Etiquetas

, , , , ,

Hi,

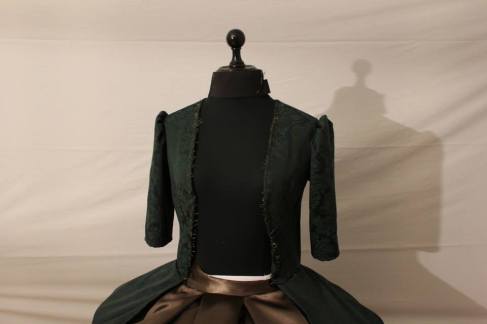
We’re so excited with the dress because every time it seems more to our idea.

To make the corset, we had some problems because we could not do it as it was at the time. Formerly they wore a corset to sieze the trunk, it was rigid and was placed inside. Then they took a piece on the front that was more decorative and it was known bodice. The voluptuous effect gave the corset that was underneath.

As we could not make the corset of the time, we do it with the resources that we had and trying to be as similar as possible.

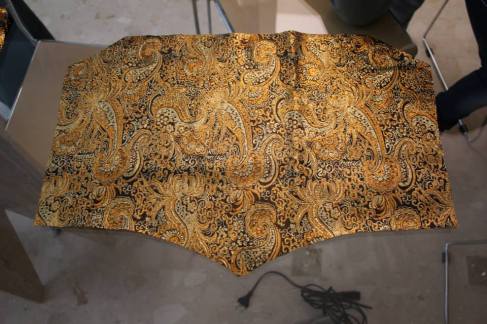
We started thinking about the different options of how we could do it. The most appropriate was putting spokes in the fabric, a flexible plates that give rigidity.

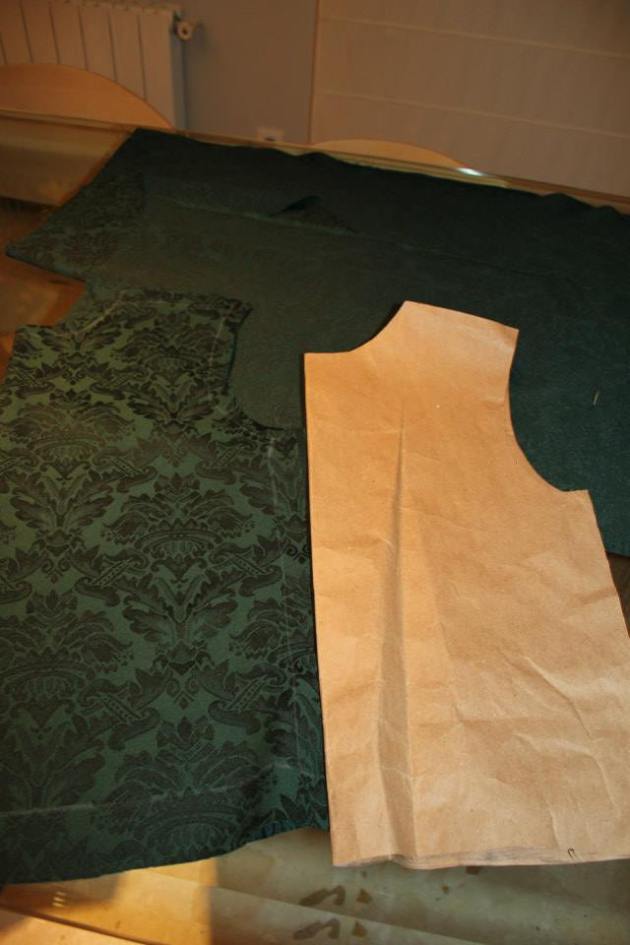
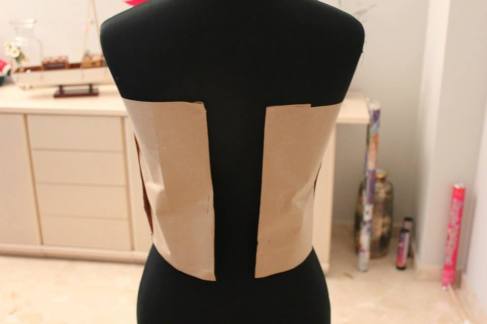
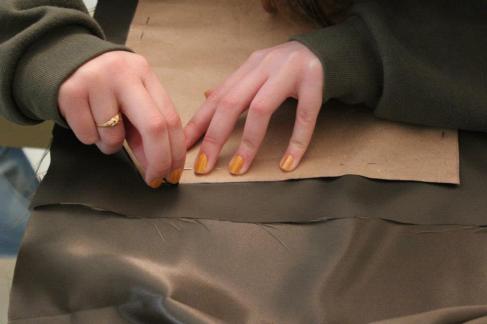
When we were sure that the patterns were as we wanted, we started to put it on the fabric, very careful not to make a mistake and do two patterns on the same side. However, we had a problem like this but we could resolve it.

When the patterns were placed in cloth, we marked it with a stitching to know where we had to cut leaving a space to have enough clothes to sew.

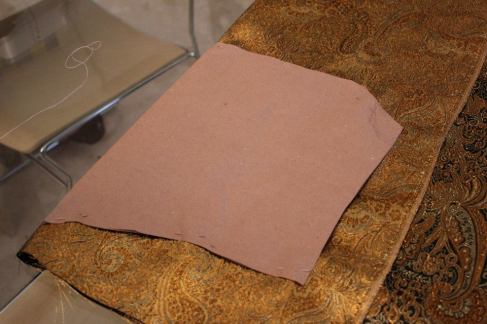
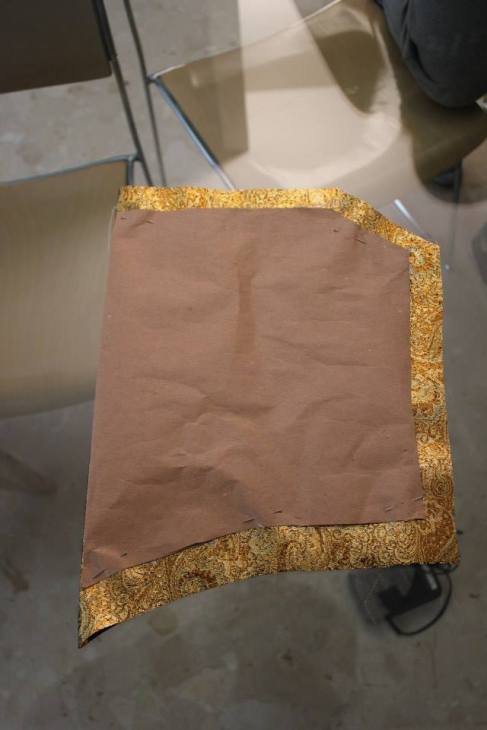
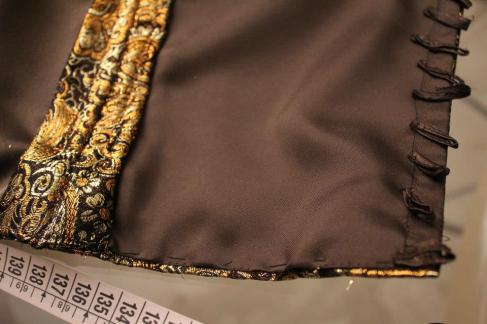
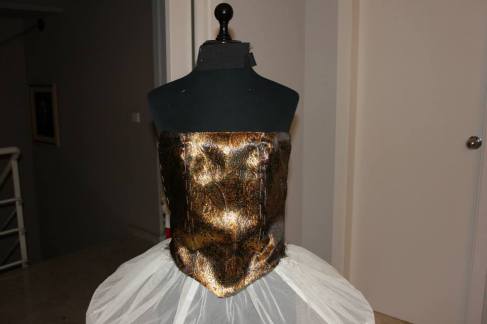
Once we cut all the pieces, we did the same procedure with satin fabric to sew it on the inside thus giving more body to the corset, because at the same time it make the fleece function.

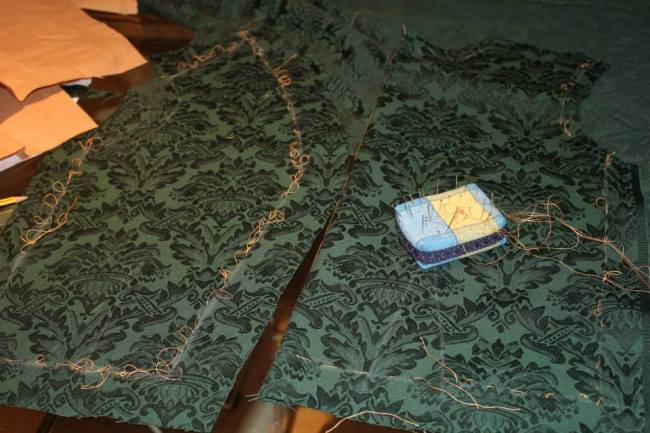
When we had all the parts of the corset, we prepared it with a stitching because it had not moved during sewing machine.

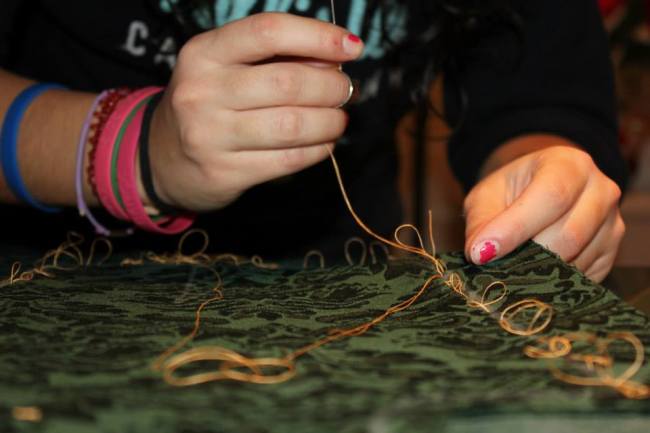
We began to sew all the pieces, leaving the undernearth opened to put the ribs.

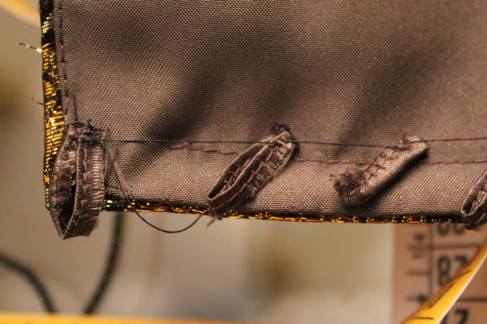
When they were sewed, we realized that uniting the three could not make them right. So we had unstitched sides and join them while we put together the three pieces. When we fix it, we made a zig-zag on the fabric that was inside because it frays very easily.

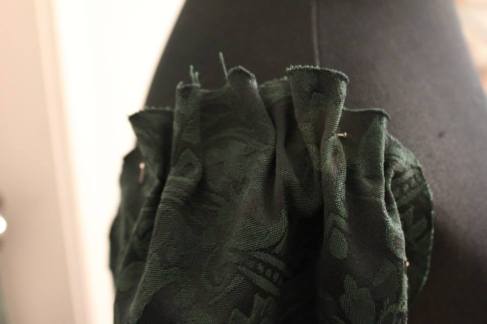
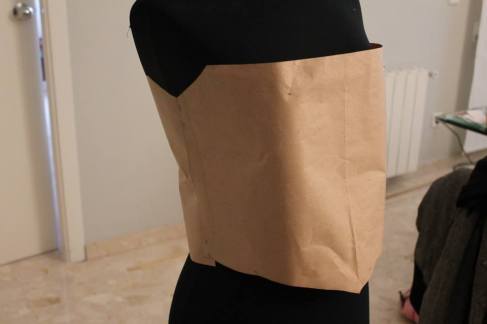
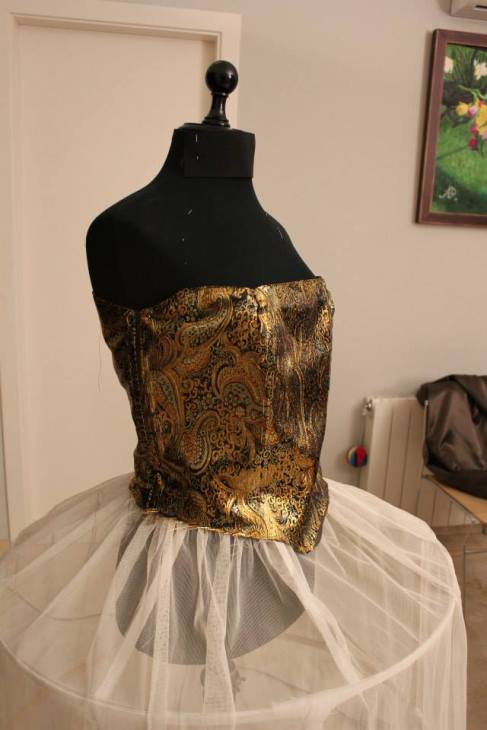
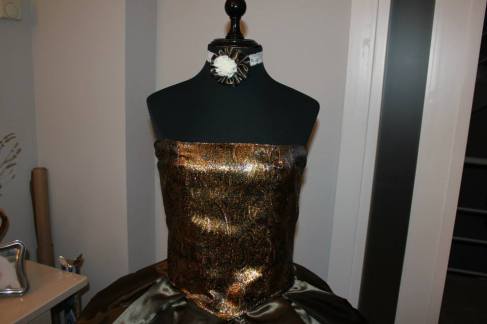
Once we had it all sewn, we put the corset on mannequin to see if it was good. As was the case, we look at where we could put the ribs in the fabric. We decided that the most appropriate place was the sides, to the back and front of each breast, to tighten the fabric and make it stay straighter.

We sew ribs inside, making two stitching machine.

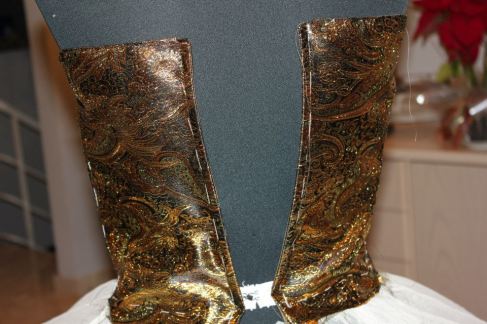
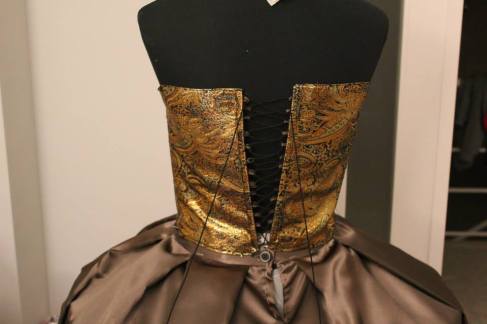
Then we put in the back a fabric loops, which are small strips of cloth sewn on both ends and usually incorporated in corsets so that after passing a cord zig-zags, to tight torso area.

It was a difficult and labourious task but finally we had a good result. You could see it here.

Bye bye. We hope that you like it!
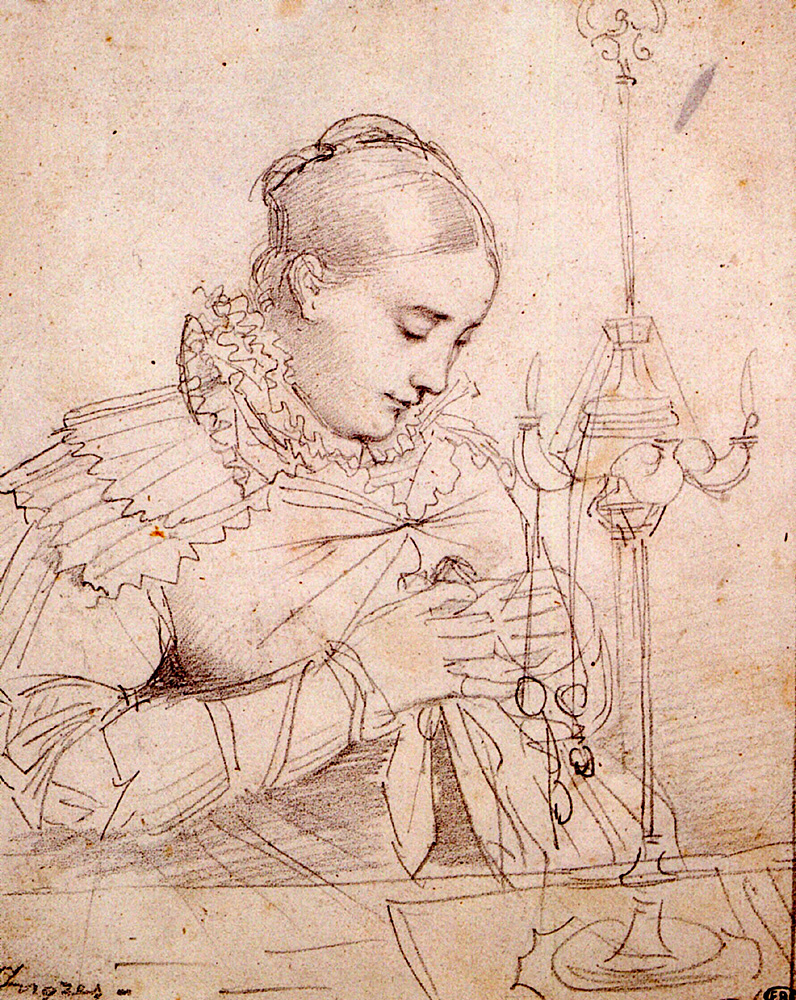
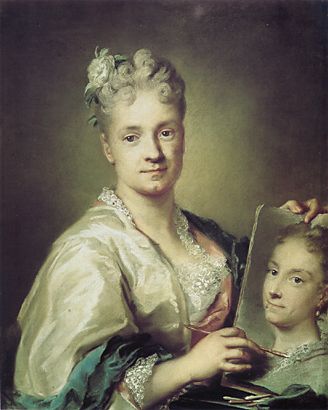
ImageImageImageImageImage

ImageImageImageImageImageImageImageImageImage

SLEEVES (Part 1)

Etiquetas

, , , , , ,

Hello,

To leave the dress coat  completely we make the sleeves.

First we put the pattern on the fabric and we did the same procedure with all the pieces to have them cutted.

We put the sleeve inside out to sew it, we did a small fold at the end and we sew it so that it was a good finish. We did it wrong because normally you should sew before in the half, but then we could make the following process without any problems and we felt that it altered the result.

To end the sleeves we decided to make a small gathered at the shoulder and getting more volume so it will not fall. First we put the sleeves into the mannequin to know how much material we had gathered to do. We marked them with needles and we sew it up with a baste called “Bastille” used to prepare pursed. When we’d done everything we sew with the  machine both sleeves and then we add to the dress.

You could see the process in these pictures. Soon we put another post. You could make a comment if you want.

ImageImageImageImageImageImageImageImageImage

DRESS COAT OR BIB

Etiquetas

, , , , , , ,

You’re welcome,

We had done the dress coat or bib which is composed of a skirt and a coat. It was put over the skirt and the corset.

To start it we took the dark green patterned fabric to make the skirt of the jacket. First of all, we fold the fabric in two pieces and put the pattern on it. Then the two equal pieces will came out.

We took it with needles and we make the fabric following the pattern with chalk. Then we cut it leaving a few inches to sew. Once we cut out two fabric pieces and sew where we had previously marked with tailor basting.

Then we sew the middle part with the  machine to work with only one piece. We put in the mannequin to know where to put the fabric folds. Then we sew the middle part with the  machine to work with only one piece. We put in the mannequin had to know where to put the fabric folds as we had. Once we prepared with needles, we measured that all were equal and sew up with the machine, trying to take it all the folds to work better with the rest of the dress.

To make the top of the jacket, we did it in two parts: the back that only one piece, and the front are two pieces, one for each side.

For starters, we put all the patterns of the back part of the dress on the fabric and we followed the above procedure.

Next, we fold the fabric and got the lateral part of the pattern. We marked leaving a space for the brand and we sew with the tailor basting following the mark, as explained above.

When we had all the pieces cut, we joined a provisional weave before sewing it with the machine and we put it on the mannequin to see if we needed to change something like the waist piece to fit by two grippers on the behind part and  front part. First we mark them with needles and when we remove it from the mannequin we prepared the weaves to know where we will sew up.

Once we had everything ready and we are secure, we started sewing with machine following the thread. Once we had it all in one piece and also the pleats sewn, we went back to put it in mannequin, always check that everything was as we wanted.

In the next post, you could see how we will made the sleeves. Here you can see another piece of our dress.

See you!

ImagenImagenImagenImagenImagenImagenImagenImagenImagen